Back to Home
By Bryan Dygert KC8LMI

|
Motorola index Back to Home |
Improve XPR 8300 Cooling By Bryan Dygert KC8LMI |
|
The XPR 8300 is a member of Motorola's MOTOTRBO system. This article tells you how to modify your XPR 8300 by relocating the temperature sensor. This improves performance of the fan, resulting in lower operating temperatures across the PA.
This is done at your own risk and will void any manufacturer's warranty!
More information on the XPR 8300 is available in this installation guide as a 5.5 MB PDF file.
The Problem:
I was working on a friend's XPR 8300. I did not have solid information on the
repeater or the board schematics. After doing some reading and finding the sensor,
and the placement of the sensor that controls the fan, I discovered that the sensor
was not mounted near the heat sink, but on the control board about four inches away
from the actual heat sink. These stations were prone to PA failures and
over-temperature problems, due to the fan coming on late, running very slow, or not
running at all during transmit and high temperature conditions. The installation
manual has this note:
Since mid 2008, the XPR 8300 Repeater has been manufactured with a power-saving main fan. The fan powers ON temporarily as a self-check after user initially turns the repeater power ON. If the repeater's internal ambient temperature remains below 30°C (86°F), the fan does not operate. It powers ON and remains operational only after the repeater's internal ambient temperature rises above 30°C (86°F), and its speed increases as the temperatures rises. At 50°C (122°F), the fan runs at full speed.
My Solution:
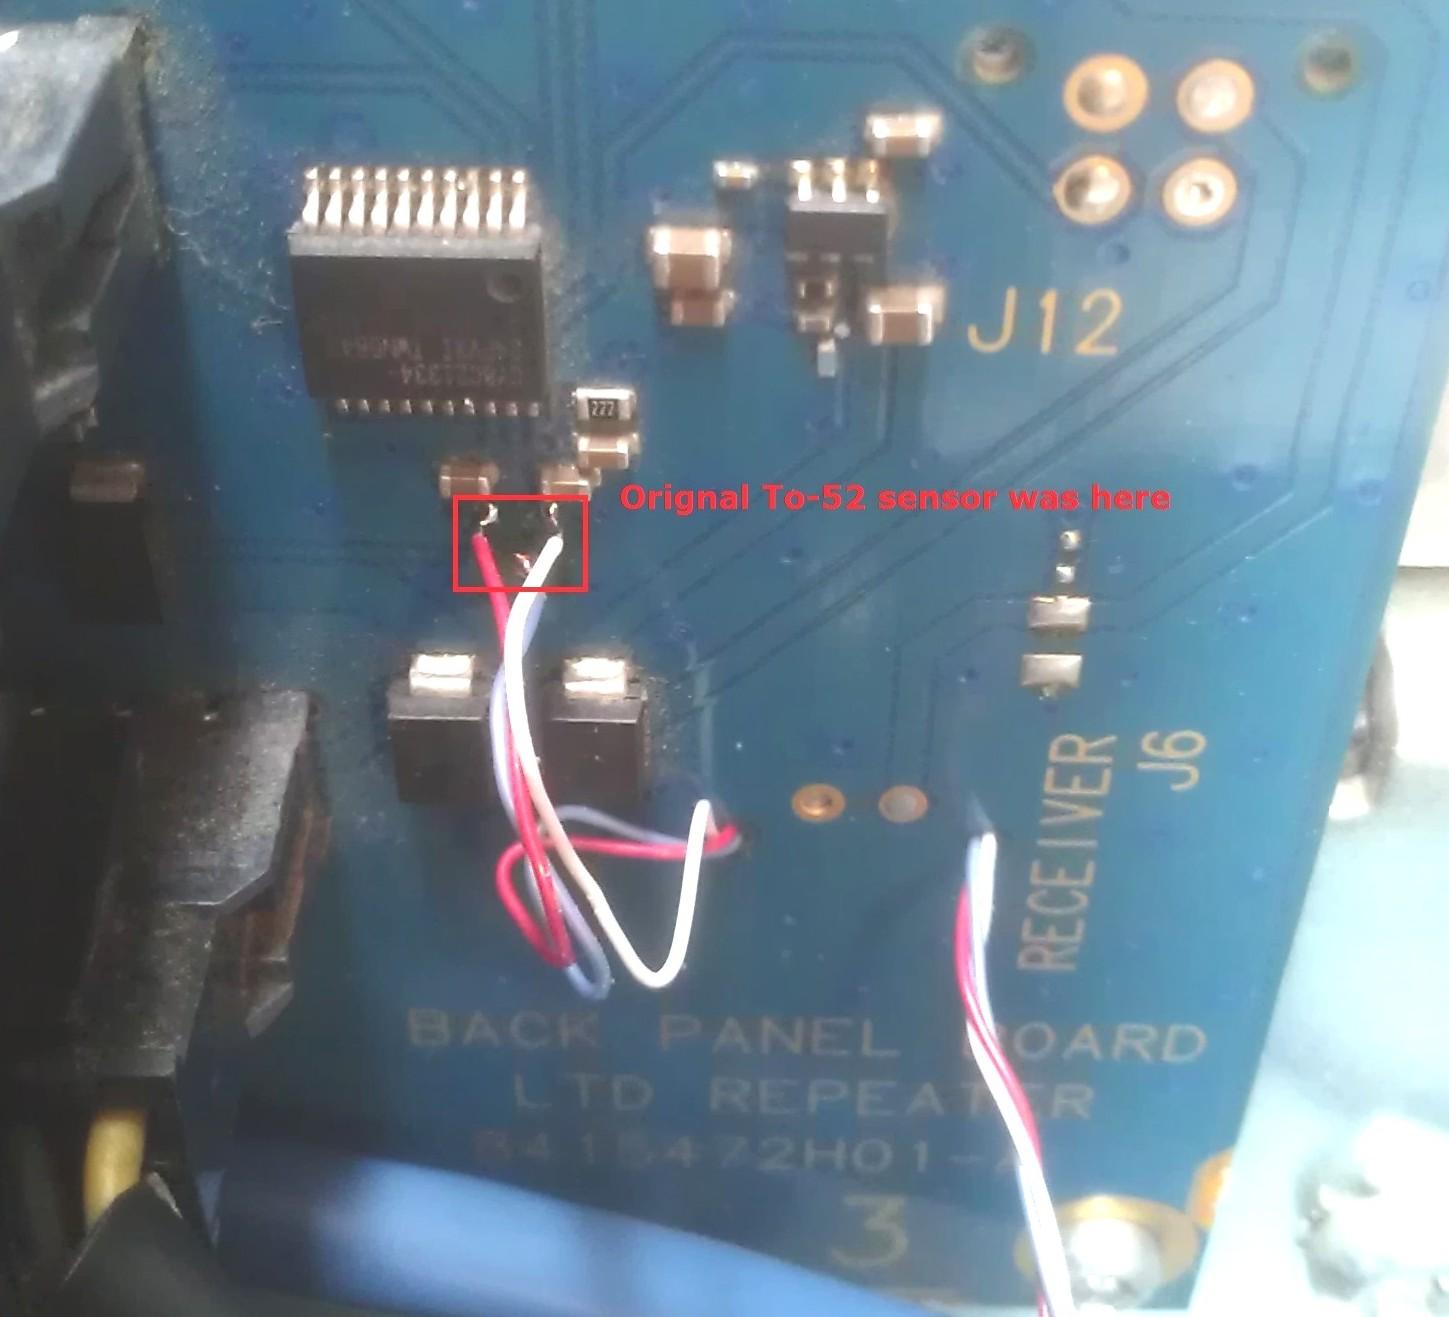
I made a decision to transfer the surface mounted temperature sensor (U52) to the heat sink. Once I located the sensor, I decided to carefully remove the board and associated plugs and wiring. Here's the connector board documentation from the detailed service manual. Use caution and don't pull the wires; just pull the connectors or damage will occur. I recommend pulling the board to gain better access and lay it on the bench to prepare it for surgery. This is the board that is situated vertically, to the left of the transmitter. It has the accessory plug and Ethernet connector. My first attempt to unsolder the sensor failed as I broke one lead off the component side. This has to be done very carefully or board and or trace damage will result. So I had to order replacements. It is a good idea to have spares on hand. They are about $1 a piece. (DigiKey part# LM50CIM3CT-ND)
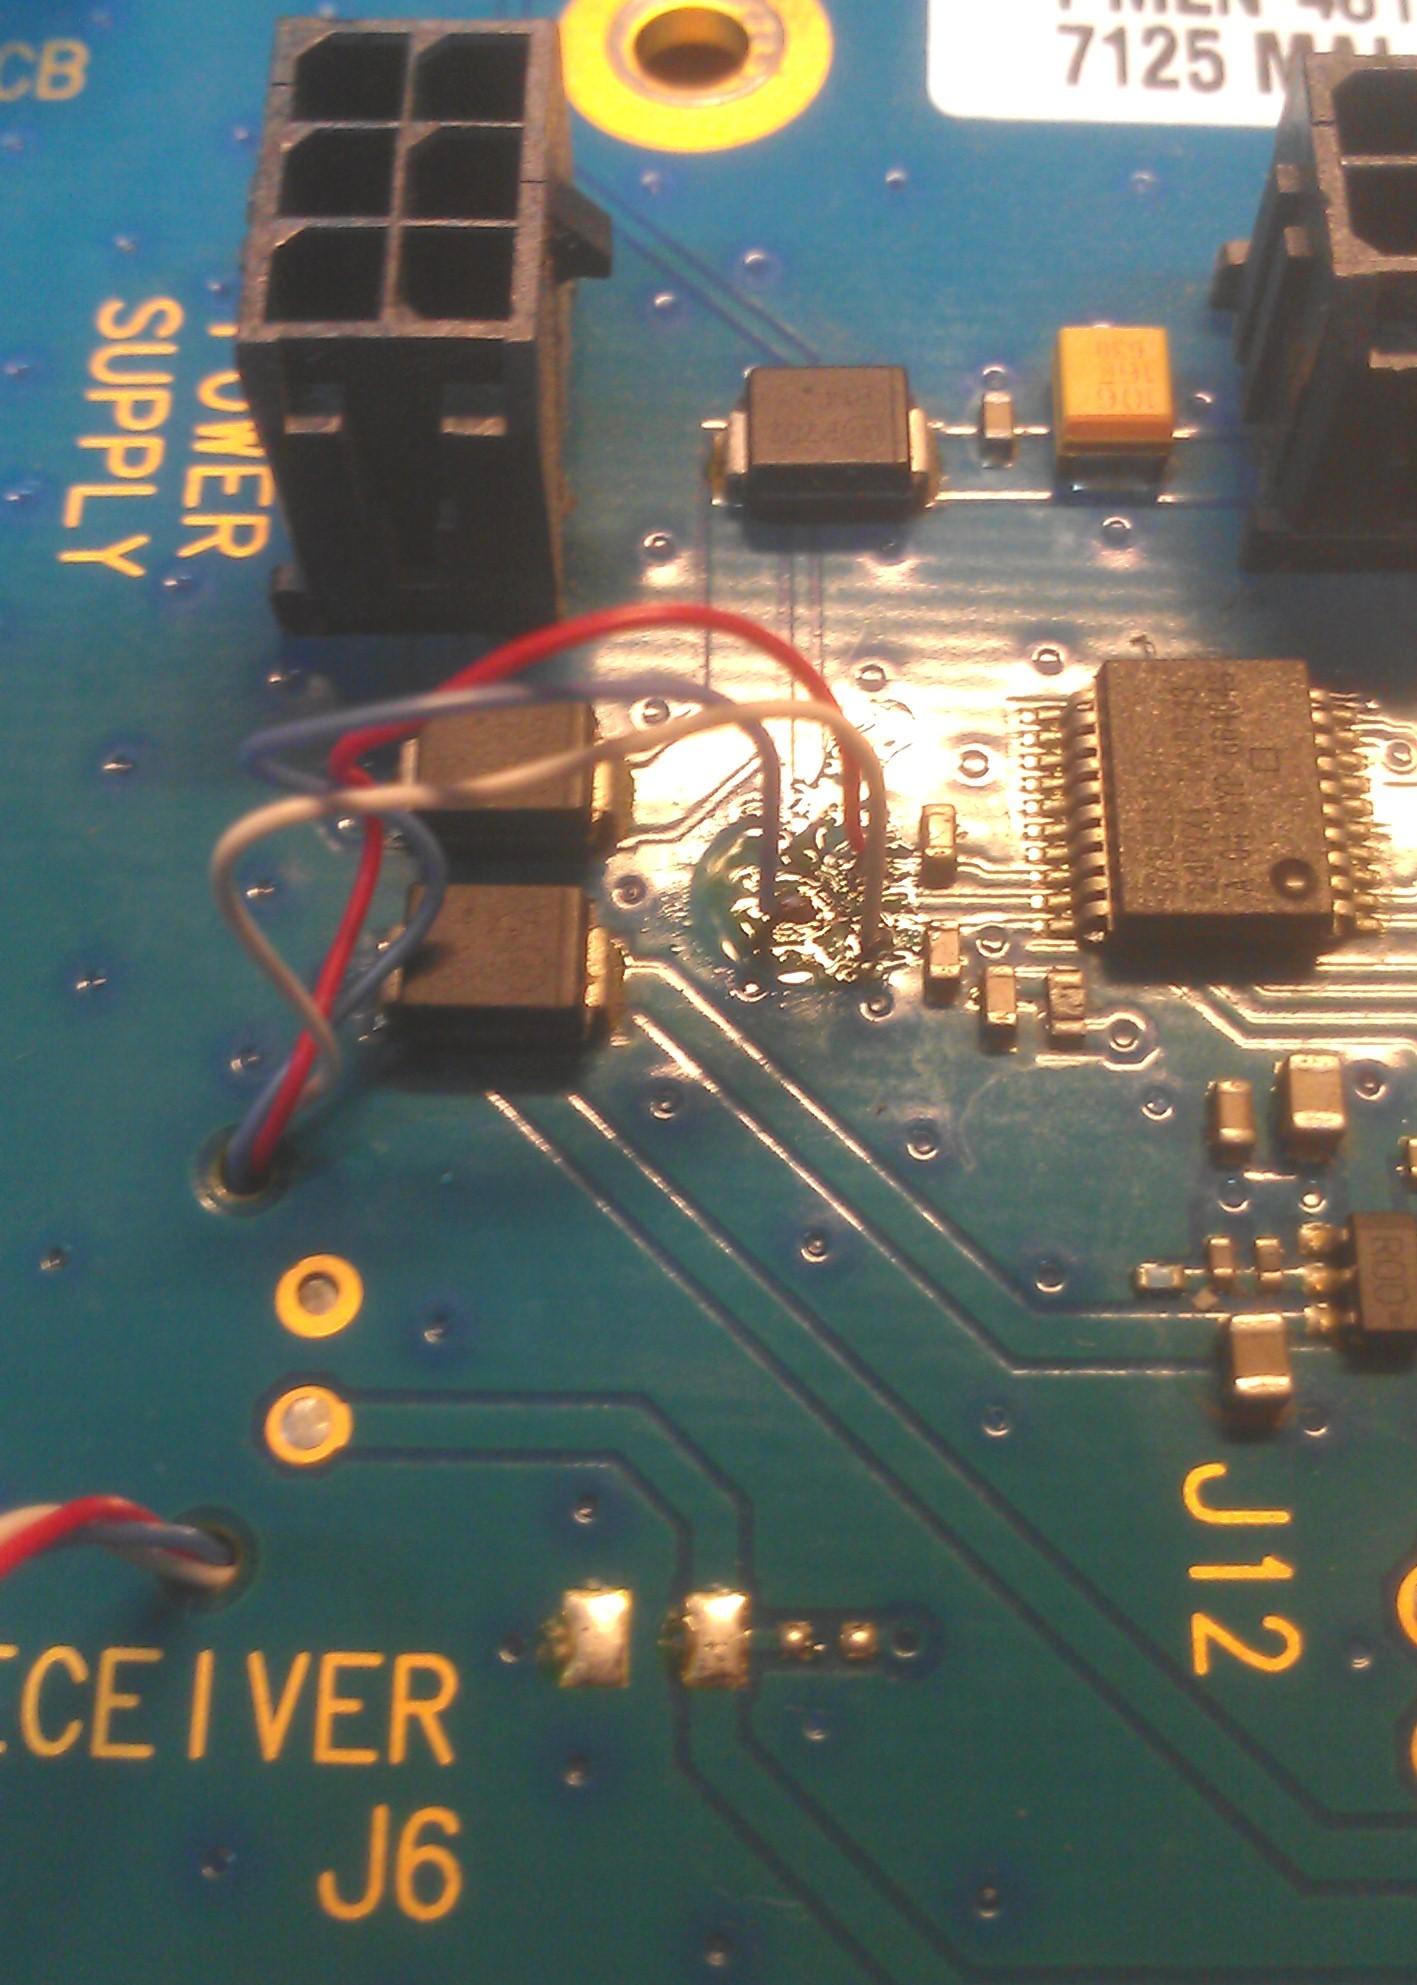
Once the sensor had been removed, the board pads were cleaned up and three fine wires were soldered on, to extend the sensor over to the heat sink. Make sure to note the correct orientation of the leads before applying power! Click on any photo for a larger image.
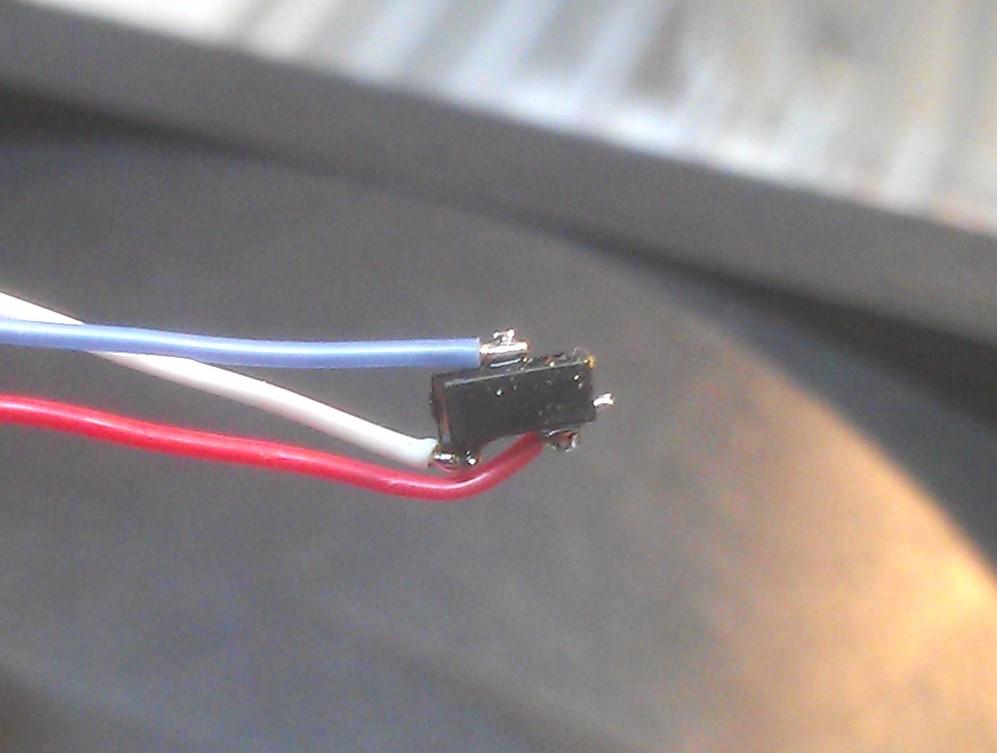
I soldered a new LM50 to the other end of the wires.
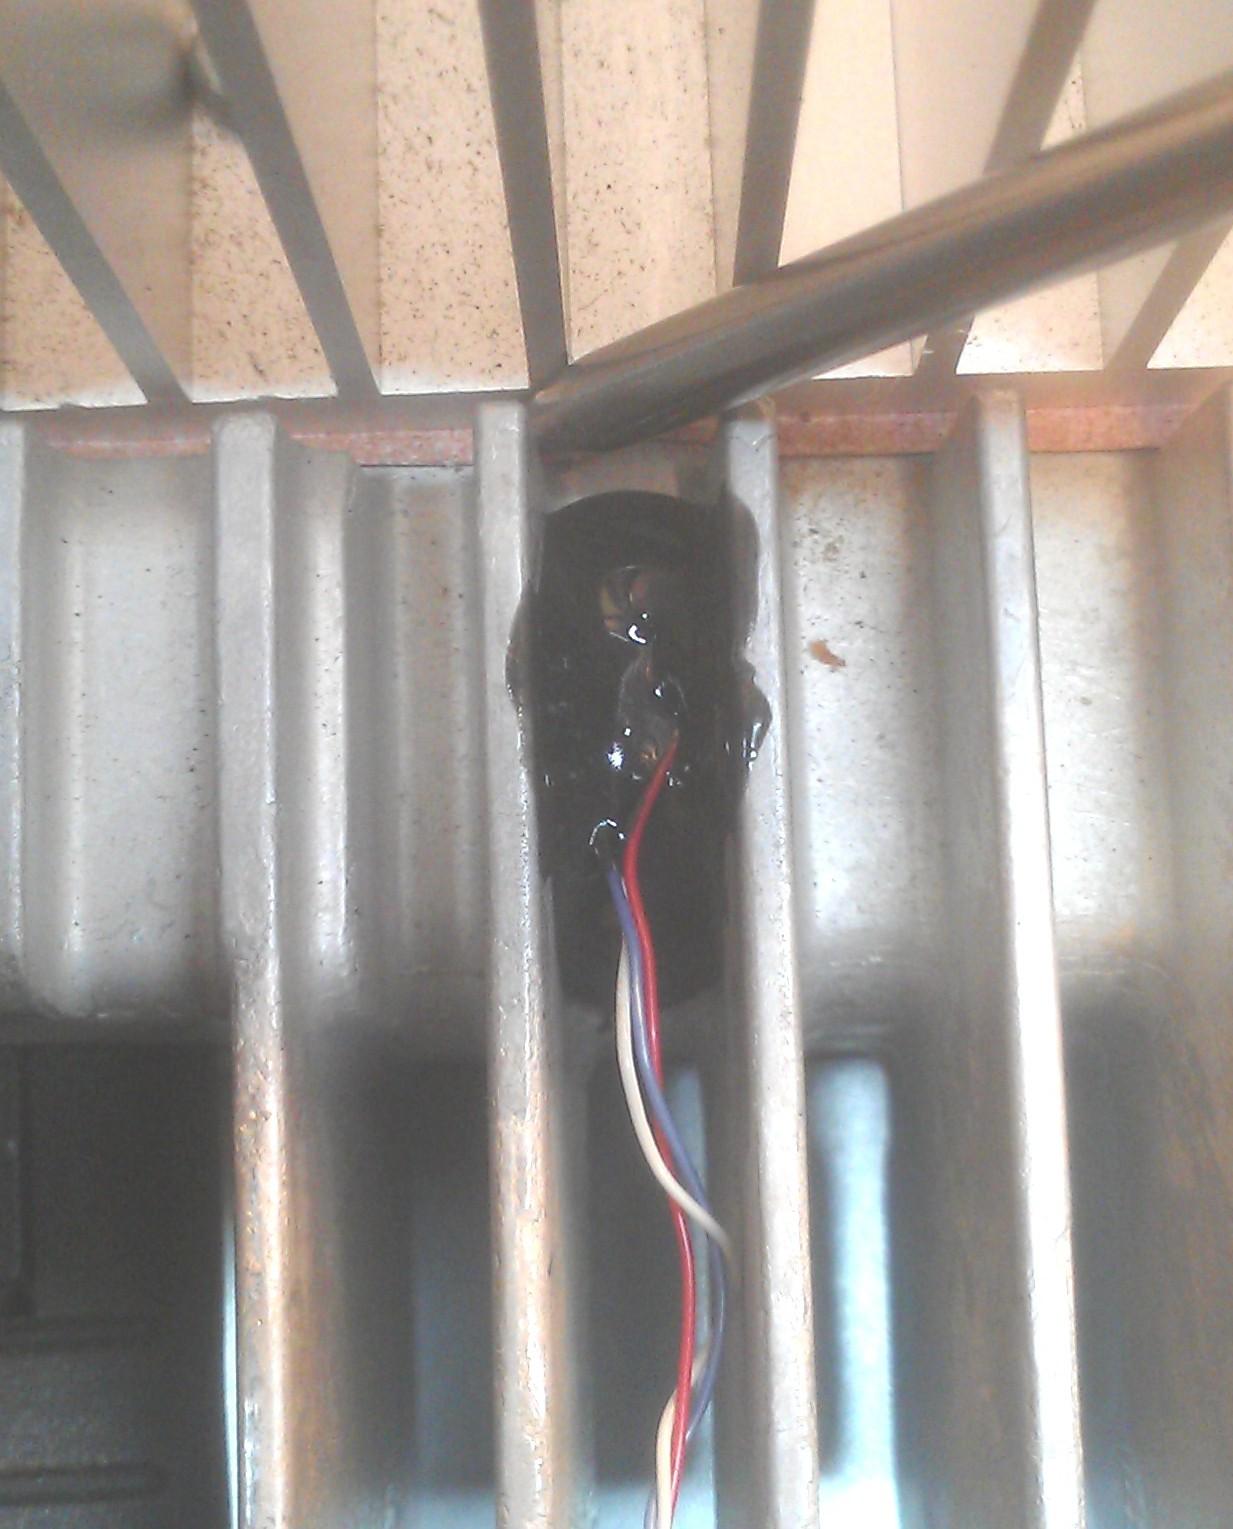
I used JB KwikWeld (an epoxy adhesive, see http://www.jbweld.com/products/kwikweld-twin-tube for more information) to secure the sensor on the back of the PA. Do your best to make sure the sensor is surrounded by the glue and nothing is shorted. Also, route and fasten the three wires away from the fan intake area so they will not be damaged.
[Note by the editor: The particular epoxy Bryan used is steel-reinforced. It is most likely electrically conductive as well. If the sensor had been insulated by some tape or heat shrink tubing, it would probably still work fine and the epoxy wouldn't bother it. I suggest, and Bryan agrees, that you use a non-conductive epoxy for this application. There are other JBWeld products that fit this requirement.]
After verifying the connections, I fired the repeater up with a dummy load on the bench. Almost immediately the fan was rolling slowly. I then left it keyed down a while; the fan speed increased as the temperature rose. I used the thermometer to check the temperature and see how the fan control worked. It seemed to gradually adjust it up or down. It probably takes around 30 minutes or so to reach its highest speed but I only tested it about 20 minutes. I'm not sure how fast it can really go. There seemed to be plenty of airflow. As it sat idle the fan speed dropped back ever so slightly then it came to a slow roll but I never did see it shut off completely. It was spinning so slow you could easily see the blades.

The repeater has been in use almost a month now with a new fan and this modification. There have been no issues so far.
Contact Information:
The author can be contacted at: his-callsign [ at ] hotmail [ dot ] com.
Back to the top of the page
Up one level (Motorola index)
Back to Home
This page originally created on Saturday 14-Jun-2014
Article text and photographs © Copyright 2014 by Bryan Dygert KC8LMI.
Edited and converted to HTML by Robert W. Meister WA1MIK.
This web page, this web site, the information presented in and on its pages and in these modifications and conversions is © Copyrighted 1995 and (date of last update) by Kevin Custer W3KKC and multiple originating authors. All Rights Reserved, including that of paper and web publication elsewhere.